
Configure SNMP on Applicare and Windows

Configure in Windows
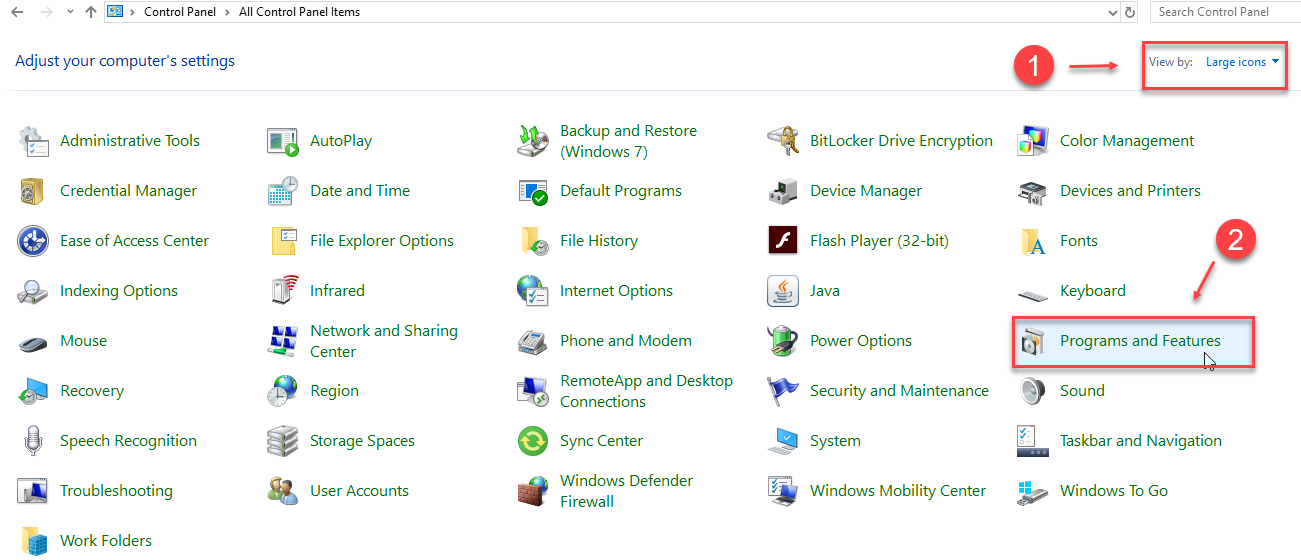
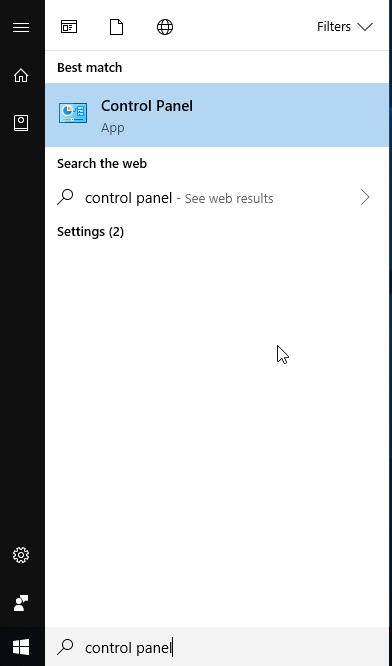
1. Type “Control Panel” in the start and select “Control Panel” option.

2. Select “Large icons” in the view by drop-down and Select the “Programs and Features”.
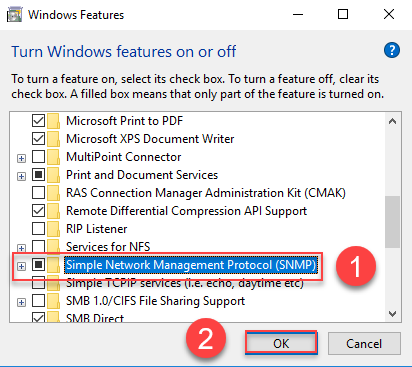
3. Select “Turn Windows features on or off”.

4. Check the “Simple Network Management Protocol (SNMP)” checkbox and select “OK” button.
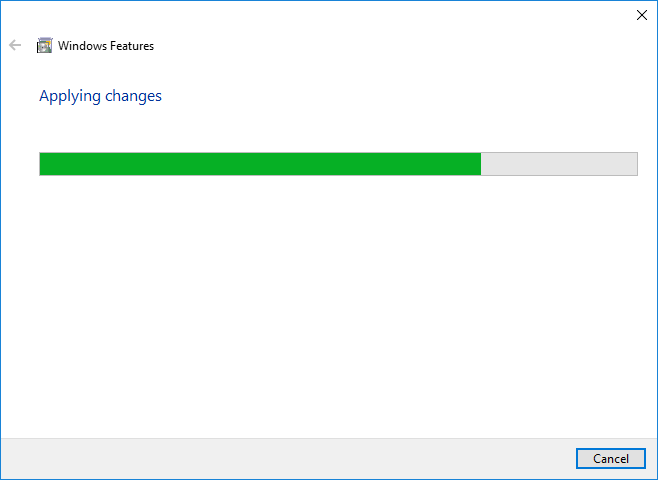
5. Please wait for the changes to apply.
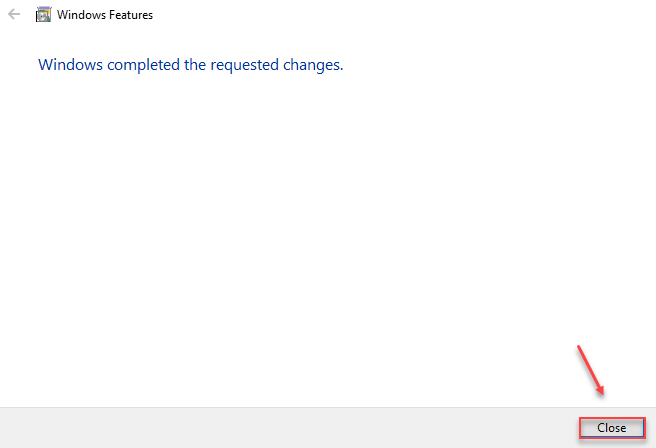
6.Click the “Close” button in the popup window.
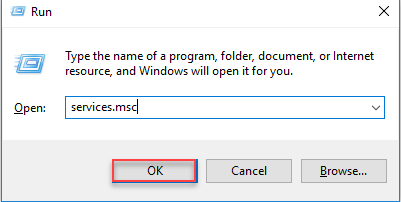
7. Type “Run” in the start and select “Run” option.
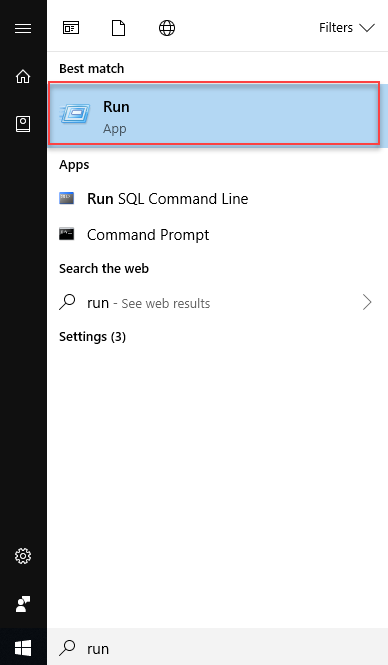
8. In the run window type “services.msc” and select “OK” button.

9. Search for “SNMP Service” you will see the SNMP service is running.

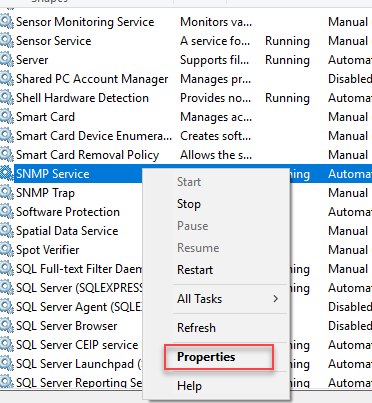
10. Right click the “SNMP Service” and select “Properties”.
11. Go to“Security” tab and make sure the “Send authentication trap” check box is enabled.
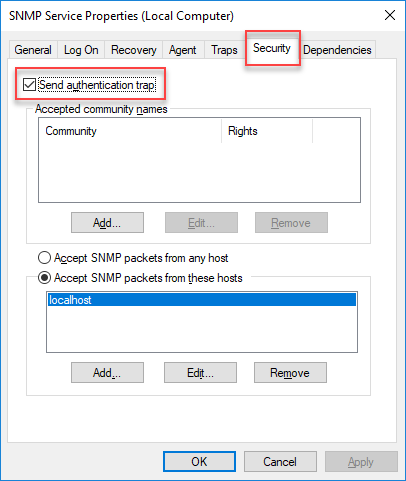
12. Click the “Add” button in the Accepted community names.

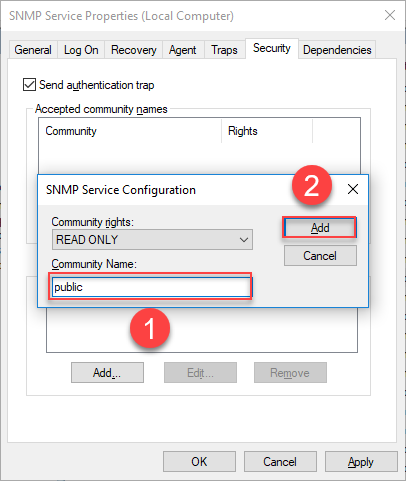
13. Enter community name as “public” and click the “Add” button.
14. SNMP Packet configuration
- We can select either “Accept SNMP packets from any host” or “Accept SNMP packets from these host” options.
- Accept SNMP packets from any host. There is no host restriction.
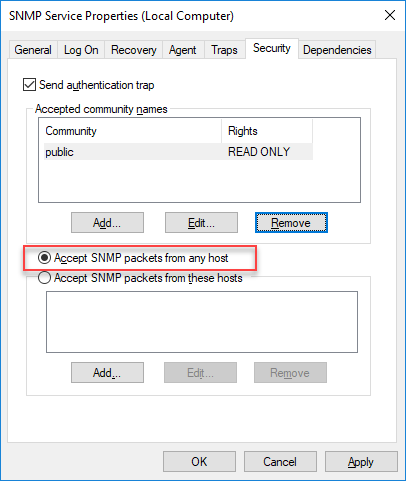
- Accept SNMP packets from these host. We can restrict to specific hosts. For this option we need to add the host address. Click the add button and enter the host address.


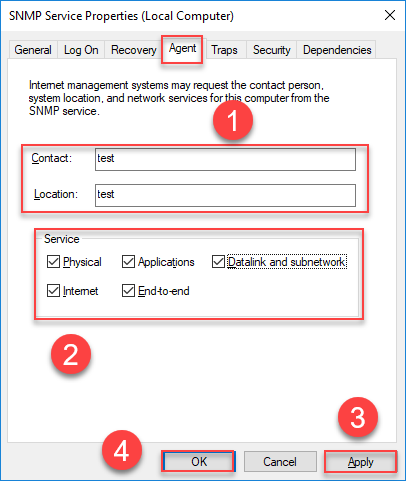
15. Go to Agent tab. Enter the Contact and Location names. Select all the check-boxes in the “Service” field and click the “Apply” and “OK” button.
16. Type “Run” in the start and select “Run” option

17. In the run window type “services.msc” and select “OK” button.
18. Right click the “SNMP Service” and select “Restart” option.

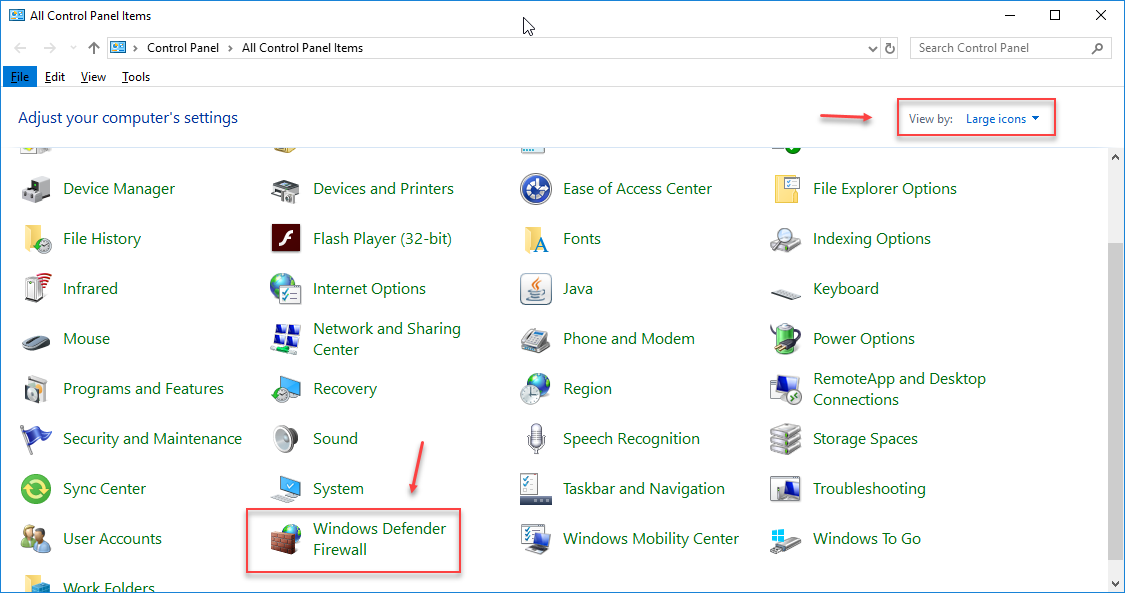
19. Type “Control Panel” in the start and select “Control Panel” option.
20. Select “Large icons” in the view by drop-down and Select the “Windows Defender Firewall”.
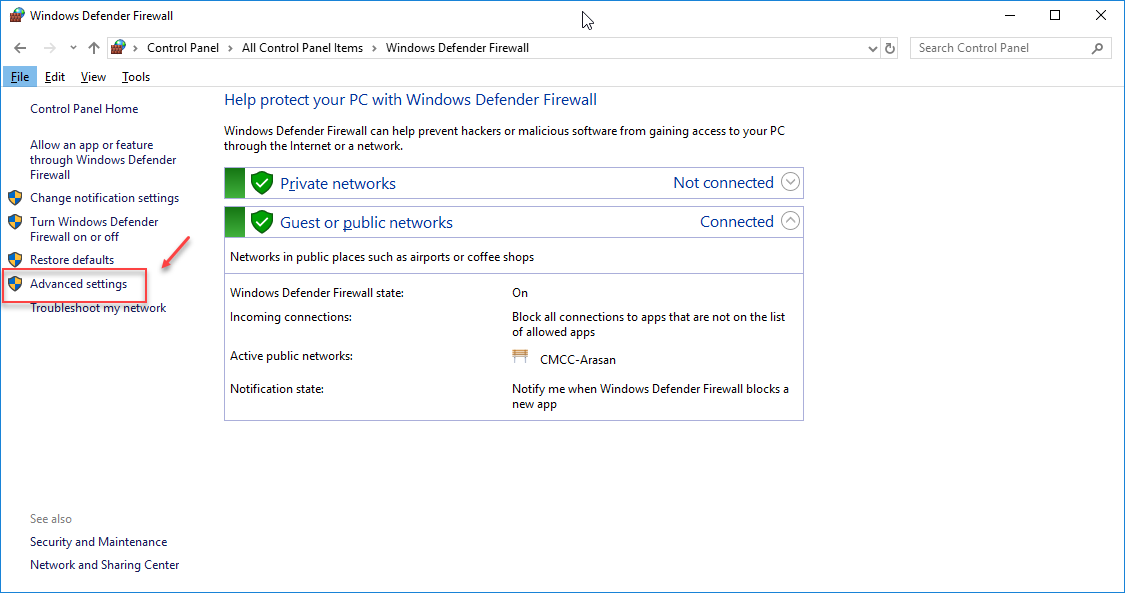
21.Select “Advanced Settings”.
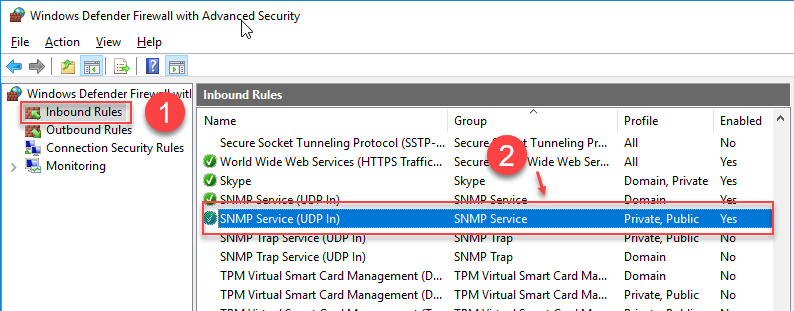
22. Select “Inbound Rules” and search for “SNMP Service (UDP In)”. Select the “SNMP Service (UDP In)” with the profile name as “Private, Public”.
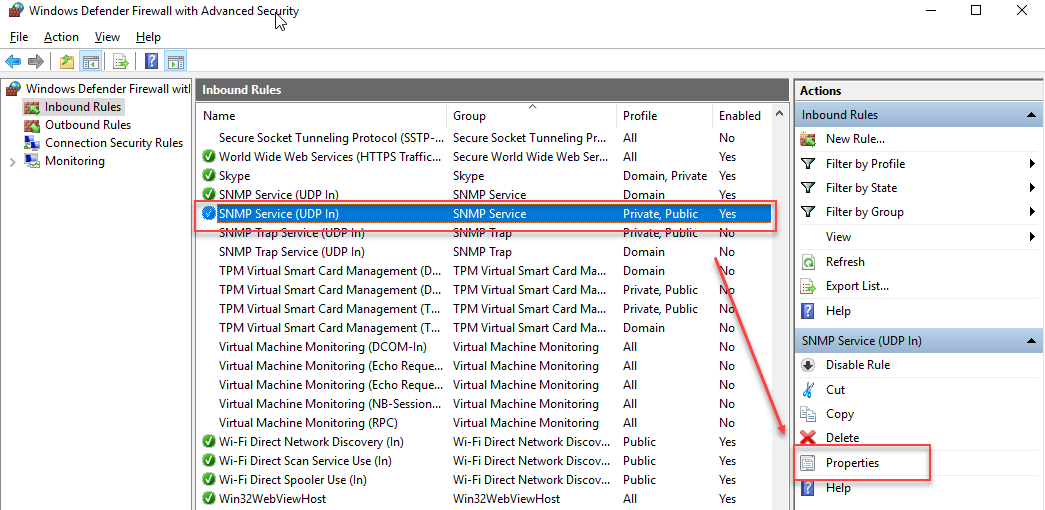
23. Select “Properties” for the “SNMP Service (UDP In)”.
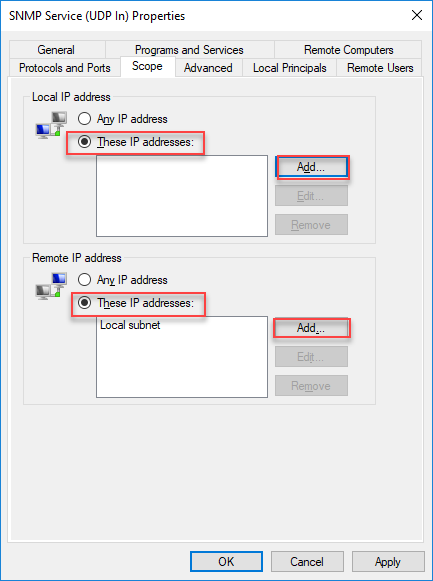
24. Go to “Scope” tab and configure Local and Remote IP Address configuration.
- Select either Any IP Address or These IP Addresses options.
Any IP Address
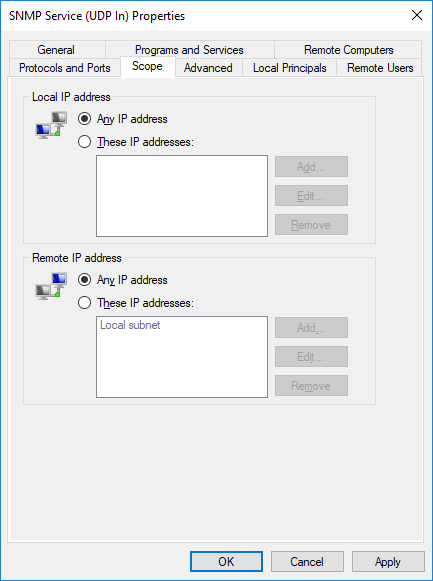
These IP Addresses
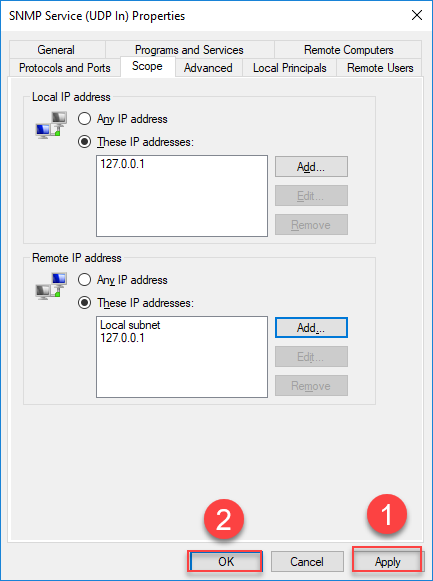
Click the “Add” button under the Local IP Address and enter the IP Address and click the “OK” button.
Likewise do the same for Remote IP Address.

25. After selecting the needed IP Address option click the "Apply" and "OK" button.
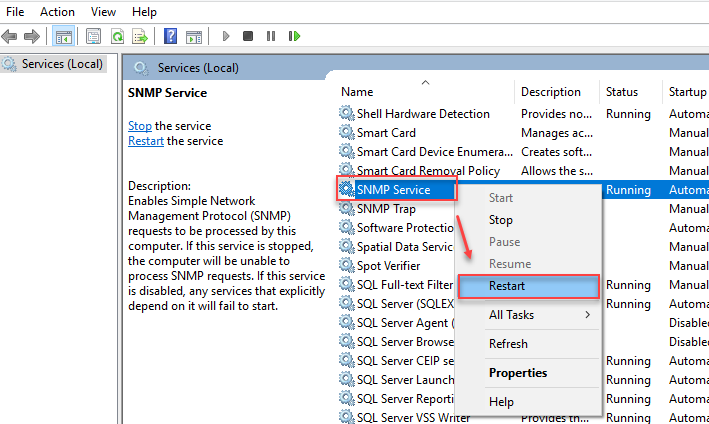
26. Finally "Restart" the SNMP Service.
Note: If we are going to restrict the host then we need to specify that host details in both the services and SNMP Service (UDP In) properties. Refer step 14 and 24.
Configure in Applicare
1. In the Overview screen click the "Add server" button.

2. In the Add server popup do the below steps.
- Enable "IS SNMP Agnet" option.
- Enter the Device name.
- Enter the Host name. Which we have configured in the Inbound Rules. (Refer Point 24)
- Select "Standard" option in the MIB Organization.
- Click "Apply" to save the settings.

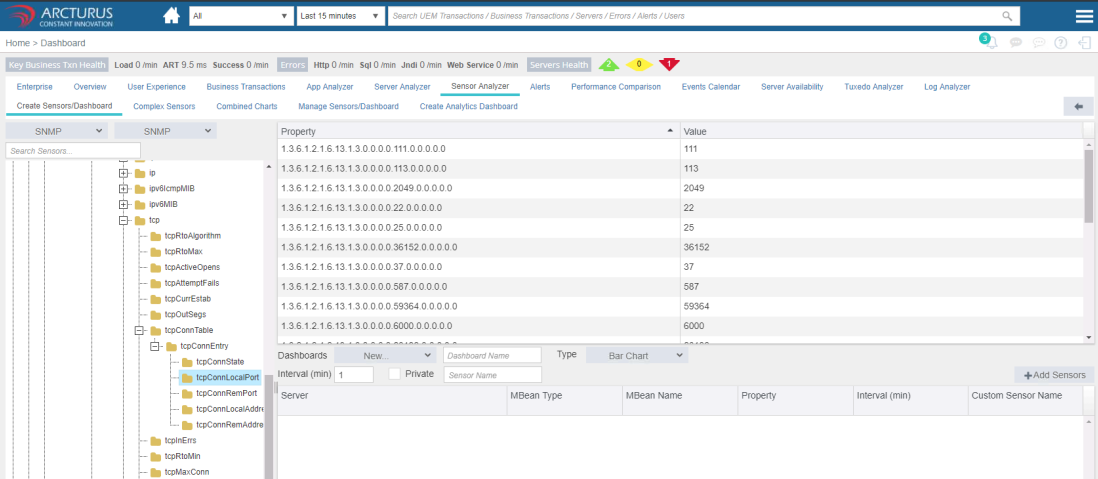
3. Configure a new Dashboard with Sensor analyzer.
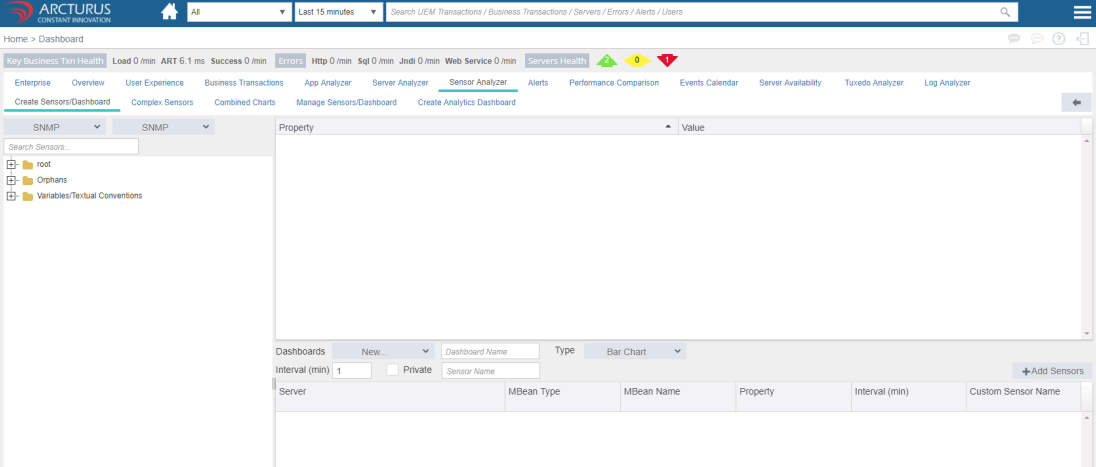
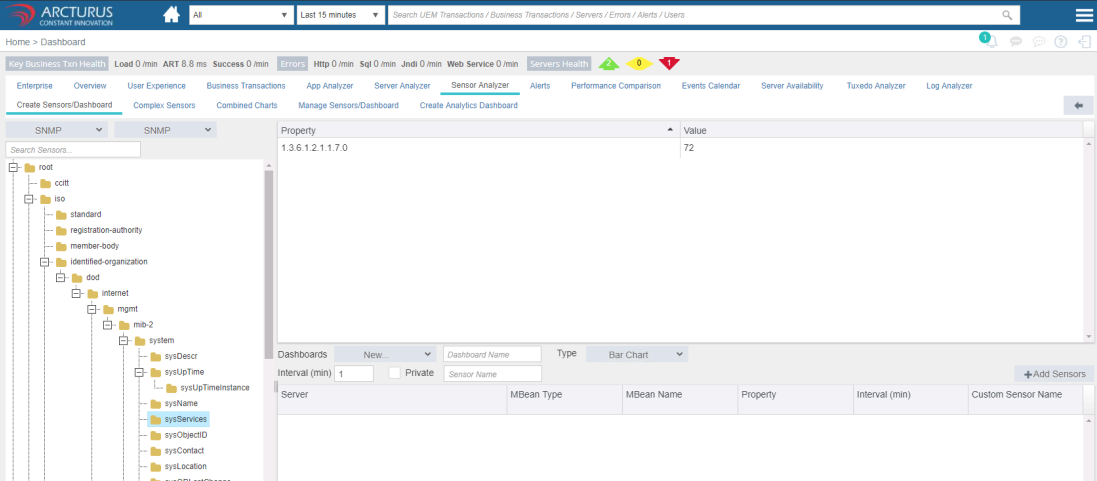

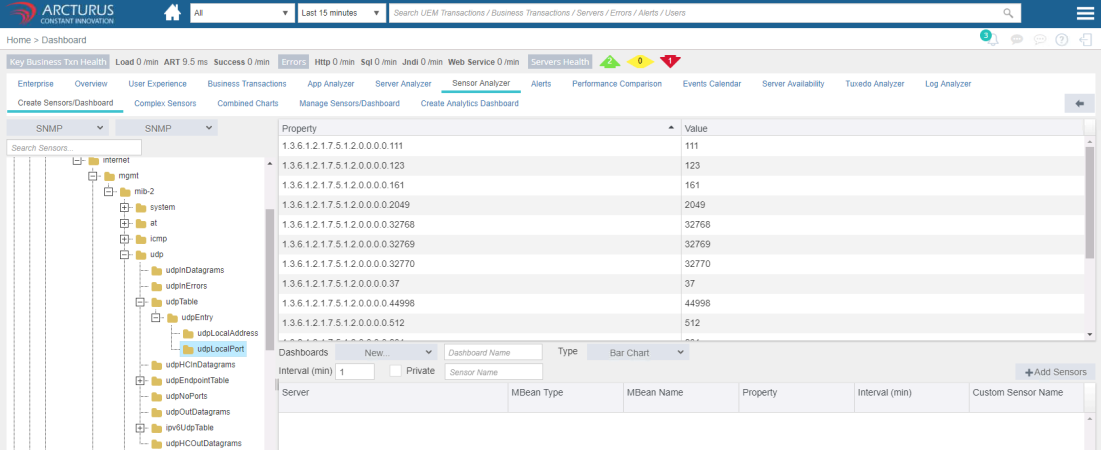
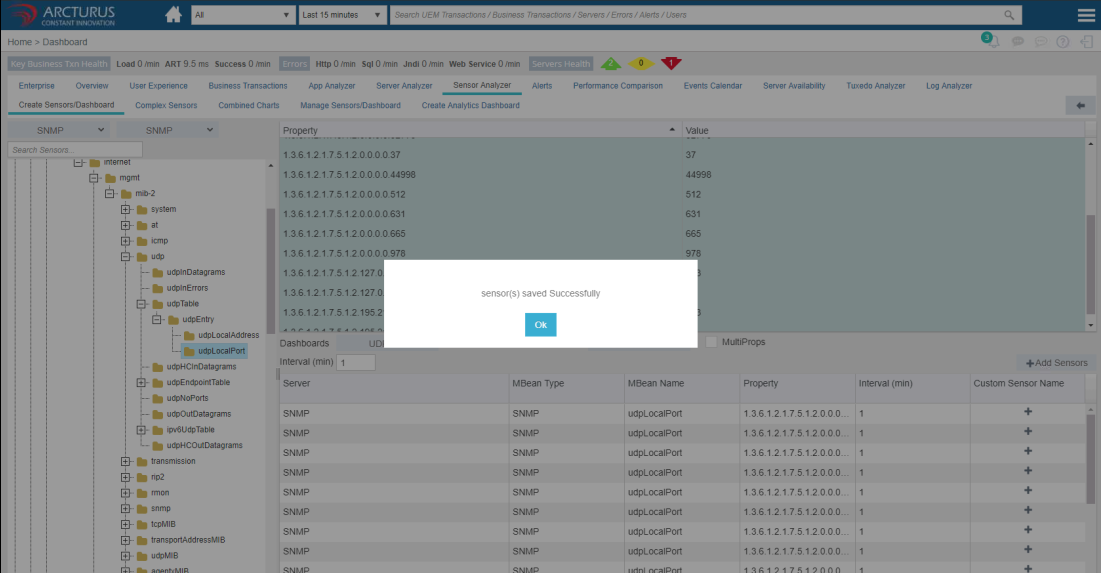
4. Adding Sensors as a Custom Dashboard.
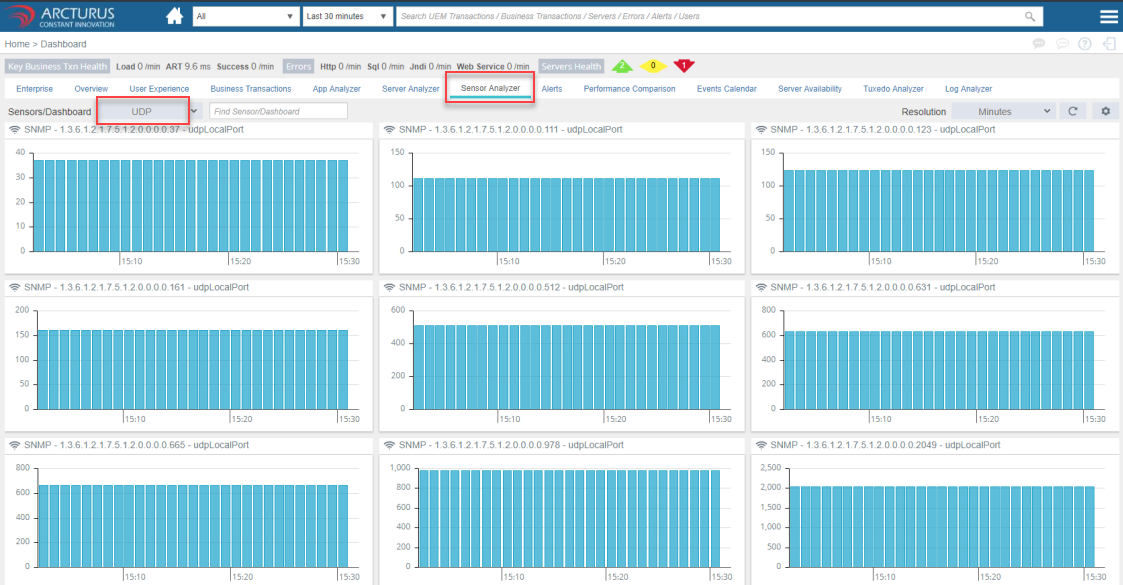
Adding UDPLocalPort connections
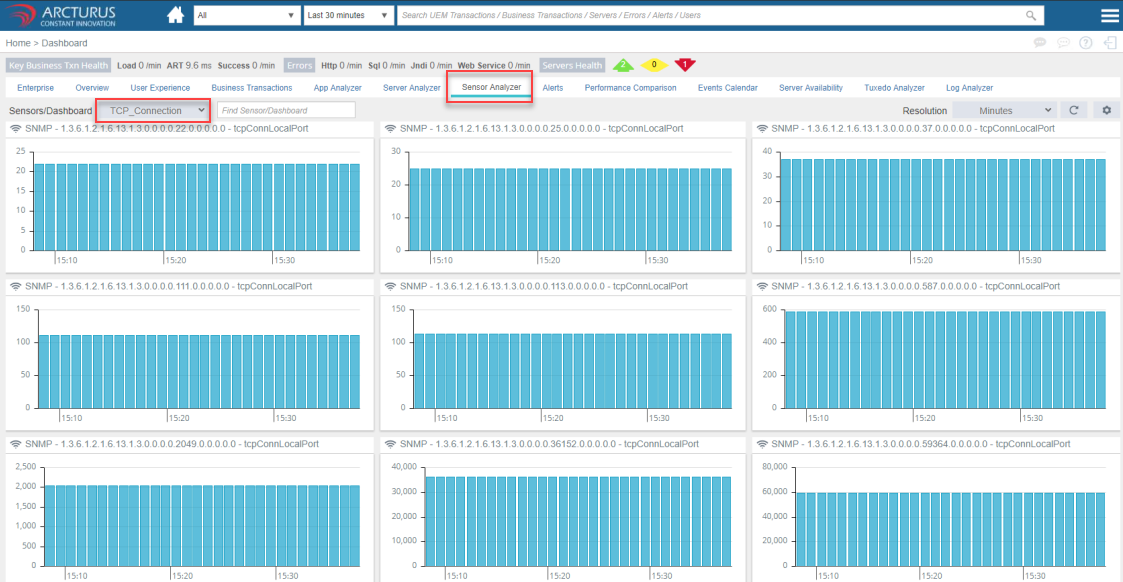
Adding TCPLocalPort connections

4. Monitoring Sensors Dashboard
Please sign in to leave a comment.
Comments
0 comments