
Screen Scraping Automation

Applicare screen scraping automation feature is to do graphical user interface operation automatically. It turns the presentation slides into executable programs for automating graphical user interfaces (GUI) actions. The slide contains a screenshot and a set of annotations. The screenshot can be of any part of a user interface, such as a button, a group of buttons, a form, a dialog box, a window, or the entire desktop. The annotations are boxes to indicate targets and text boxes to indicate actions to be performed on the targets.
Requirements
Make sure your system has the correct version of the Java Runtime Environment (JRE) installed.
- Windows/Mac OSX: Java Runtime Environment (JRE) 1.6 or newer
- Linux: Java Runtime Environment (JRE) 1.7 or newer
Recorder
Sikuli Slides Recorder is a utility to help you quickly generate drafts of slides by recording your interactions with an interface.
Steps:
From Applicare 8.5.1 we are not shipping sikuli-slides-1.5.0.jar and it is made available at
https://s3.amazonaws.com/ARC_Downloads/installers/sikuli-slides-1.5.0.jar
For this to work you will need to copy this file to WEB-INF lib for applicare.war or applicare_agent.war (depending upon where you are running these synthetic monitors).
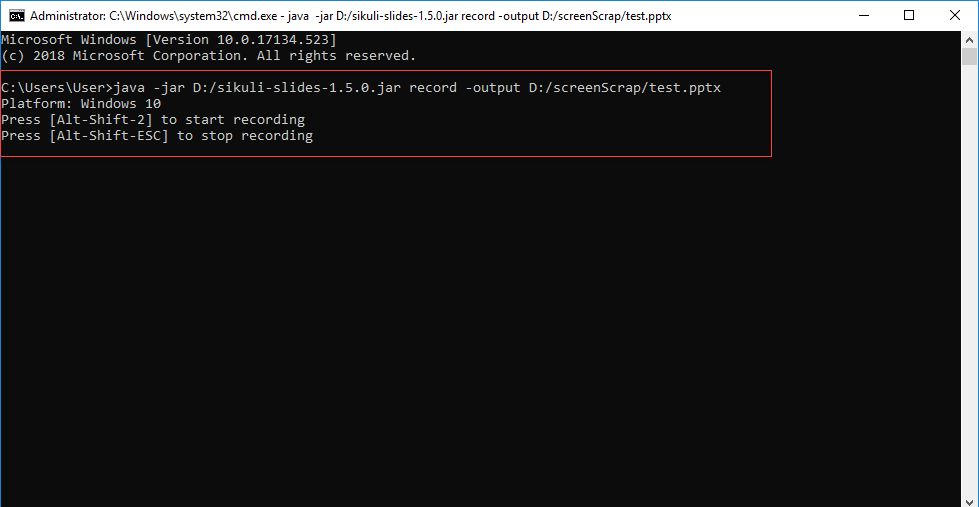
1. Open the the executable sikuli-slide jar file location from the path <ApplicareServerHomeDir>/server\webapps\applicare\WEB-INF\lib.
2. Run the following command in a terminal to start the recorder.
java -jar <jarfilePath>/sikuli-slides-1.5.0.jar record -output <outputfilePath>/<filename>.pptx
1.<jarfilePath> - Specify the jar file path location.
2. <outputfilePath> - Specify the output file path location.
3. <filename> - Specify the output file name.
Example: If our jar file is available in the path"D:Applicare/server\webapps\applicare\WEB-INF\lib" and we would like to generate the output file “test.pptx” in the path “D:/screenScrap” then the above command should be
java -jar D:Applicare/server/webapps/applicare/WEB-INF/lib/sikuli-slides-1.5.0.jar record -output D:/screenScrap/test.pptx
Then, you will see these messages.
On Mac/Linux
Press [Ctrl-Shift-2] to start recording
Press [Ctrl-Shift-ESC] to stop recording
On Windows
Press [Alt-Shift-2] to start recording
Press [Alt-Shift-ESC] to stop recording
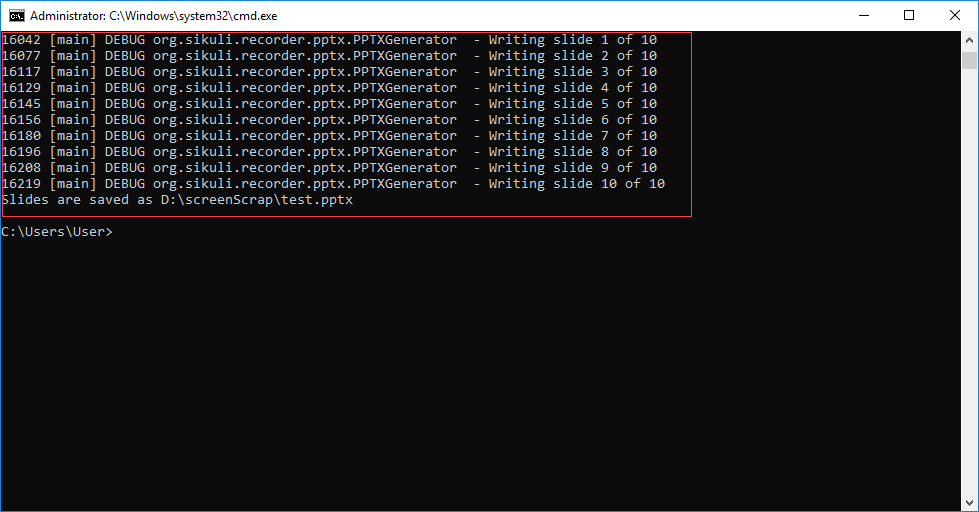
4. It is time to switch to the interface you want to generate slides for. When you are ready, Minimize the terminal window and press Ctrl-Shift-2 (or Alt-Shift-2 on Windows) to start recording. Each time you click or type, the recorder will record it as an event. When you are done, press Ctrl-Shift-ESC (or Alt-Shift-ESC on Windows) to stop recording. The events that were recorded will be converted into a series of slides and written to a .pptx file. On each slide is a screenshot accomplished by a text box with an action word and a rectangle around the target.

If you have PowerPoint editor you can view the existing file: Some of the screenshots of the existing file

Please make sure UI flow is in the correct order. If the flow is not recorded properly update the action what you want, by editing with Microsoft PowerPoint editor.
Actions
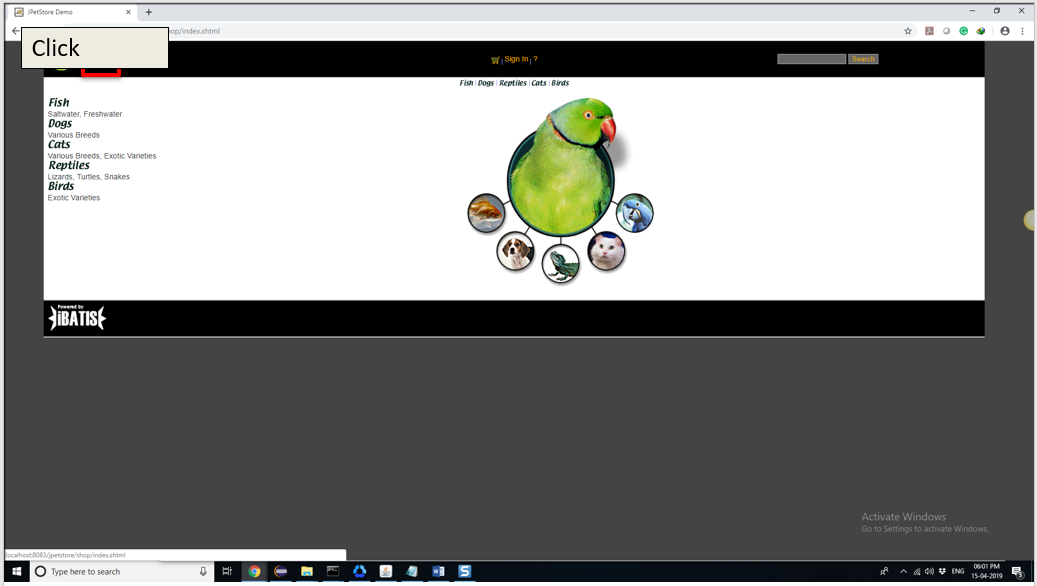
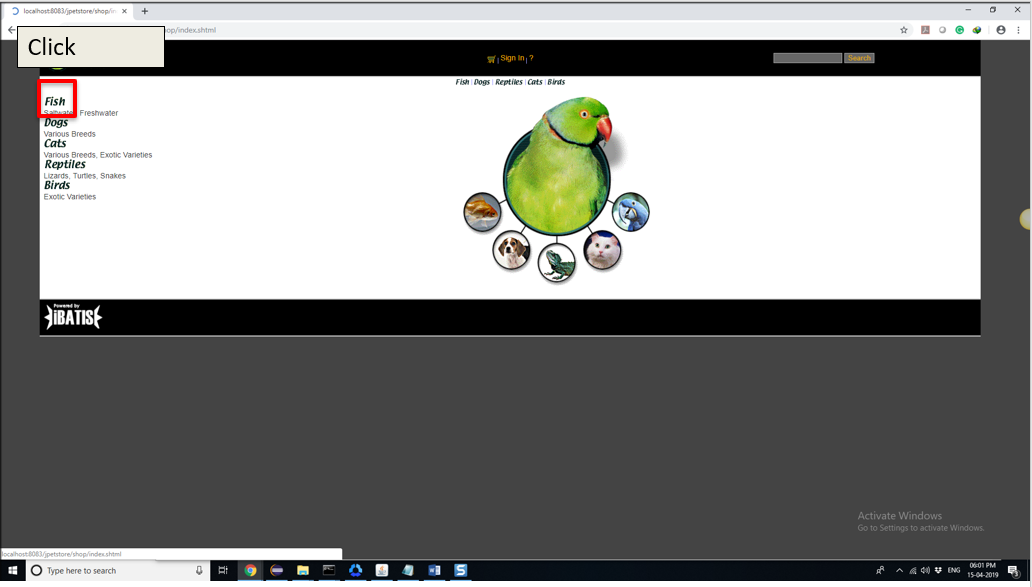
Click
Execute a mouse left click action on a target. To define a click action, write the word click in a text box and draw a rectangle around the target. The word is not case sensitive. You can style the text box and the rectangle using any font, color, or line width.

Right Click
Execute a mouse right-click action on a target. To define a right-click action, write the word right click in a text box. You can also write aliases such as right-click or right click. Then, draw a rectangle around the target.

Double Click
Execute a mouse double click action on a target. To define a double-click action, write the word double click in a text box. You can also write aliases including double-click or double click. Then, draw a rectangle around the target.

Type
Type a string in a target. To define the type action, write the word type in a text box. In the same text box, write the string that should be typed after the word type. Then, draw a rectangle around the input target.

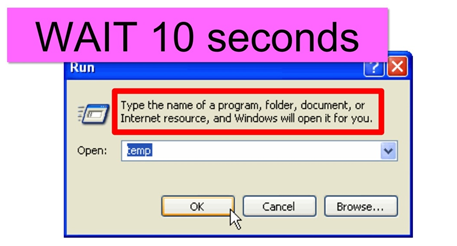
Wait
Wait for a target to appear before proceeding to the next slide. To define a caption action, write the word Wait in a text box, insert a screenshot, and draw a rectangle around a target. By default, it waits for 10 seconds for the target to appear. The wait time can be specified by writing the amount of time following the action word in the same text box. Alternatively, the wait time can be written in another text box.
Not Exist
Check if a target does not exist. If the target can be found, slides execution is aborted. It can be used to check if contents that are supposed to disappear after a certain event (e.g., clicking another tab) indeed becomes invisible.

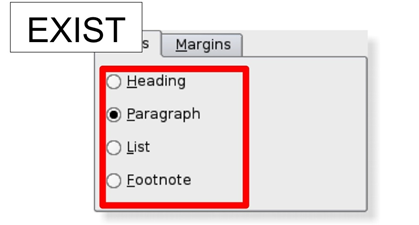
Exist
Check if a target exists. If the target cannot be found, slides execution is aborted. It can be used to test if the right picture or message is shown after a certain event (e.g., clicking a tab).
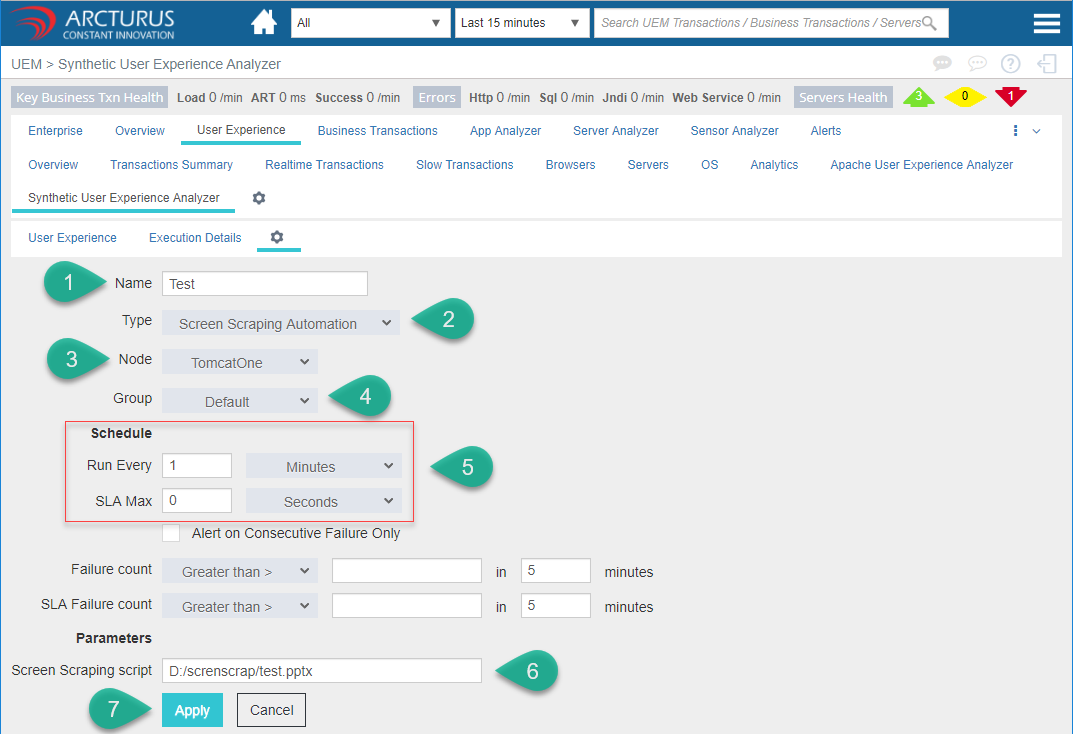
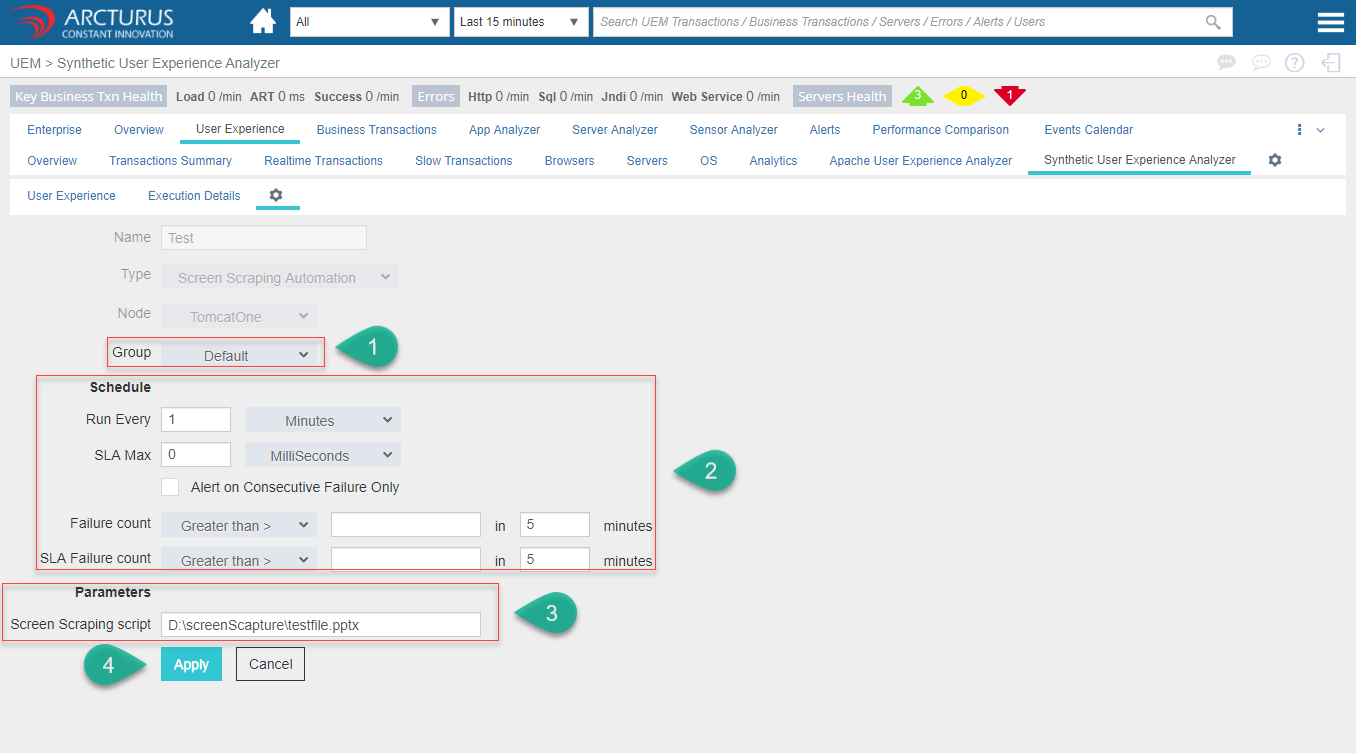
Add Screen Scraping Automation in Applicare
1. Enter the name in the name filed.
2. Select "Screen Scraping Automation" type from the type dropdown.
3. Select the "Node" to execute the screen scraping automation.
4. Create a new "Group" or select the default group from the Group dropdown.
5. Specify the "Schedule details"
6. Enter the .pptx file location in Screen Scraping script field.
7. Click the "Apply" button to save the settings.

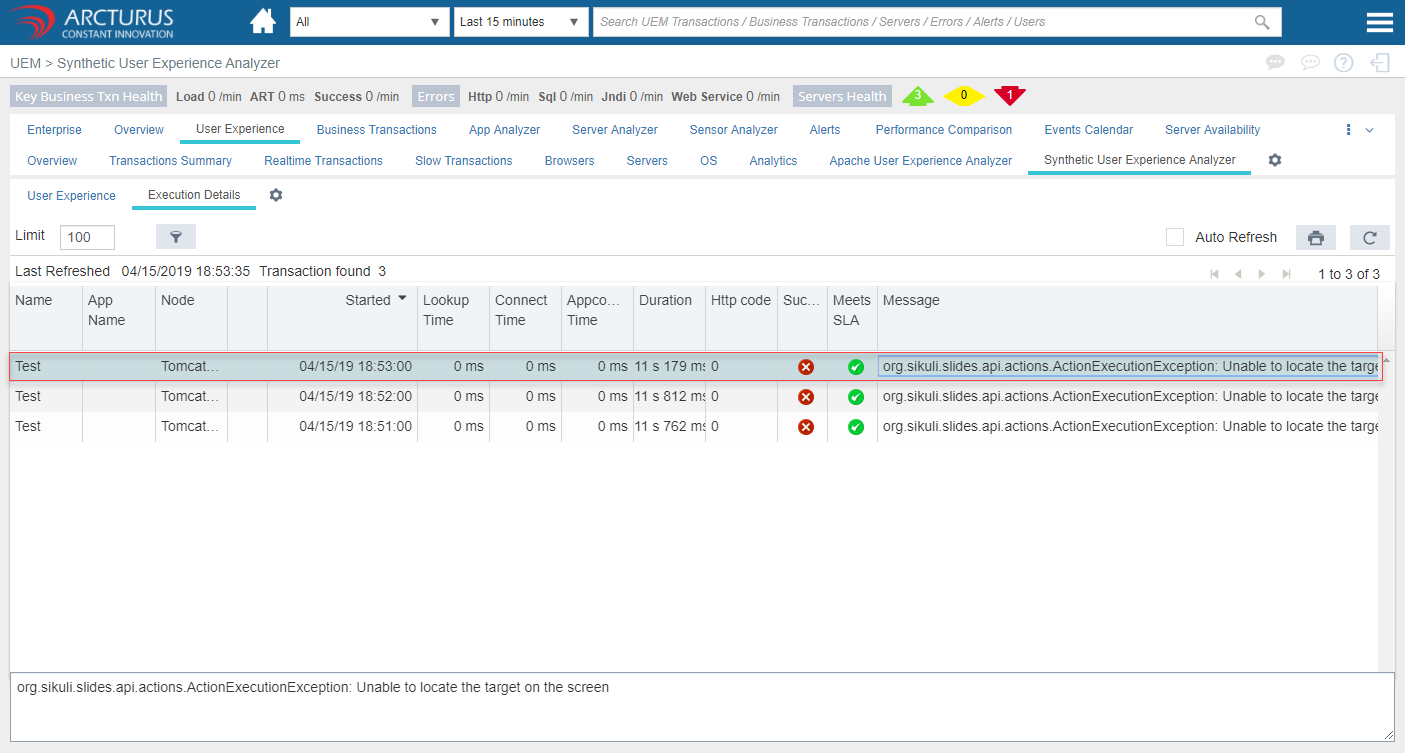
Transactions
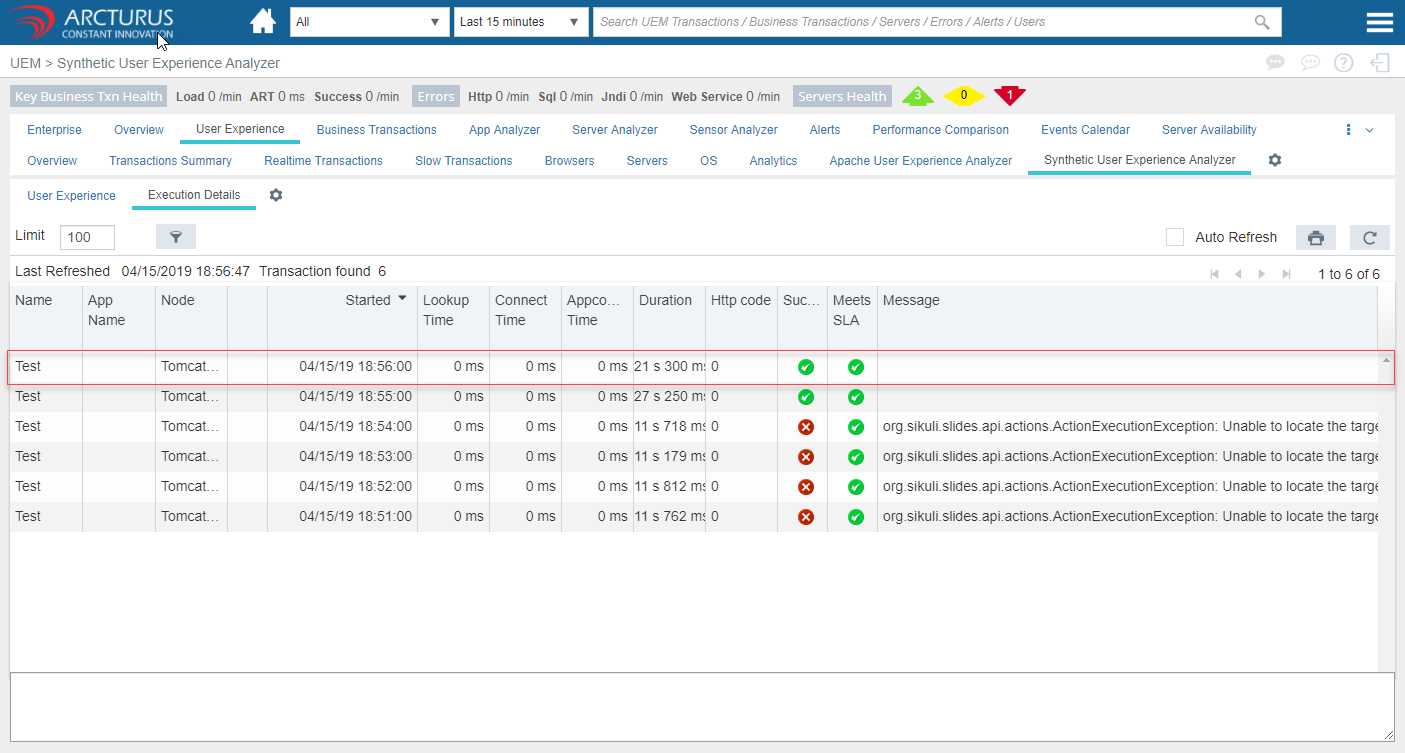
The UI should be as it is in the target machine as we have in the pptx file. Otherwise, the transaction will fail and it will display the error message Unable to locate the target on the screen.
User Experience

Execution Details
Fail Transaction
Success Transaction
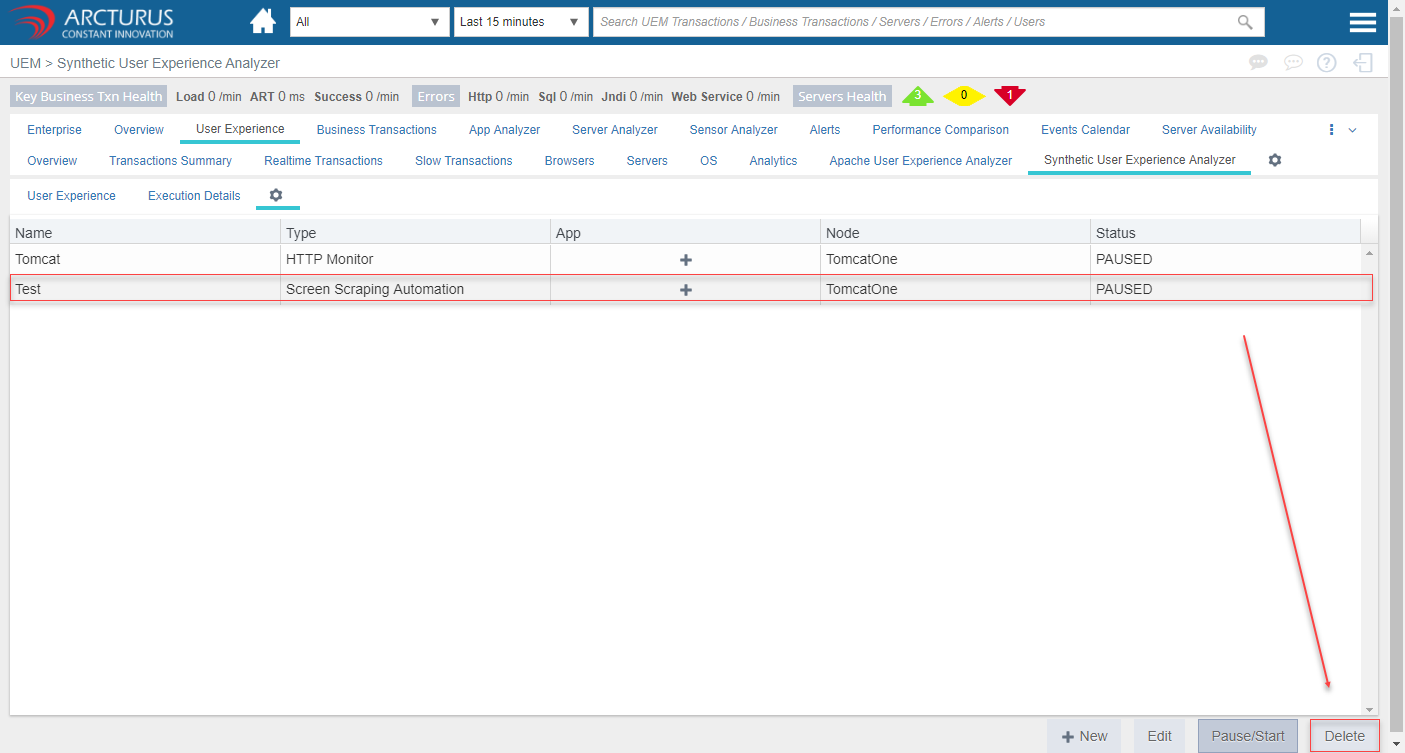
Edit Transaction
Select the Transaction and click the "Edit" button.

Pause Transaction
Select the Transaction and click the "PAUSE/START" button.

Delete Transaction
Select the Transaction and click the "DELETE" button.
Please sign in to leave a comment.
Comments
0 comments