
Role-based Access Control Using LDAP Groups

Layout
Company Name: Arcturus Technologies, Inc.
Members:
- Hugo Williams
- John Keats
- John Milton
- Robert Browning
Admin:
- Hugo Williams
- Robert Browning
Readonly:
- John Keats
- John Milton
LDAP is a hierarchical tree structure. We need to assign the topmost parent of our structure, which logically is the name of the company fitting that requirement. Therefore, we pick the name arcturustech as the topmost parent.
Under arcturustech we assign our members. There are many ways to organize members. For this guide we are organizing them based on identity and roles. Under the roles we have two sub-divisions: readonly and admin users.
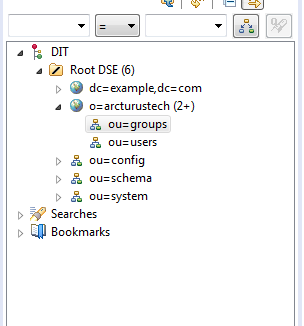
Our structure:

Install Apache Directory Studio or Eclipse IDE in the LDAP Perspective
To install the Apache Directory Studio, visit the following link: http://directory.apache.org/studio/downloads.html. Follow the installation instructions.
To use the Eclipse IDE, go to Window->Open Perspective->LDAP.
Create a New Server and Connection
- Open Apache Directory Studio or the Eclipse IDE using the LDAP perspective.
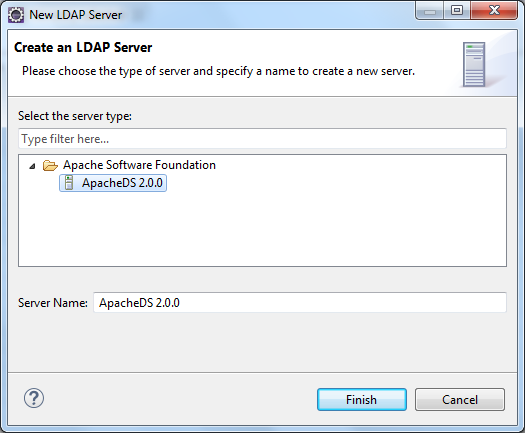
- Create a new server by right clicking in server area and selecting New -> New Server. Select Apache Server and click 'Finish'.

- Start the server.
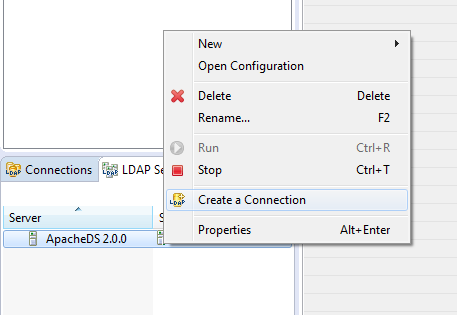
- Create a new connection by right clicking on the server and choosing Create a Connection.
- Expand the Root DSE folder. There are three sub-entries: ou=schema, ou=config, and ou=system. These are partitions in the server. Do not modify them unless you know what you are doing.
Create New Partition
To add our company to the root tree, we need to create a new partition. Everything related to the company will be attached to this new partition. Follow these steps
- Go to the Servers panel, and right-click on your server.
- Select Open Configuration. A server.xml editor will appear on the main panel.
- At the bottom of the server.xml file, there are five tabs. Click the Partitions tab.
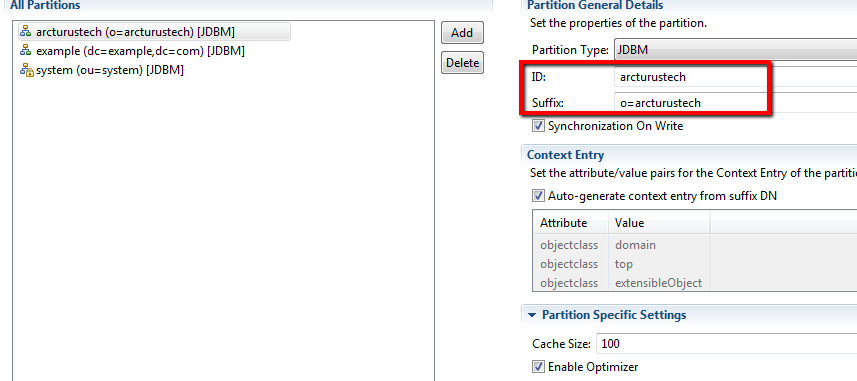
- Click on Add and enter the following details for this new partition:
ID: arcturustech
Cache Size: 100
Suffix: o=arcturustech
- Save your changes (CTRL + S). A new partition has been added.
- Restart your Apache DS server to reflect the changes.
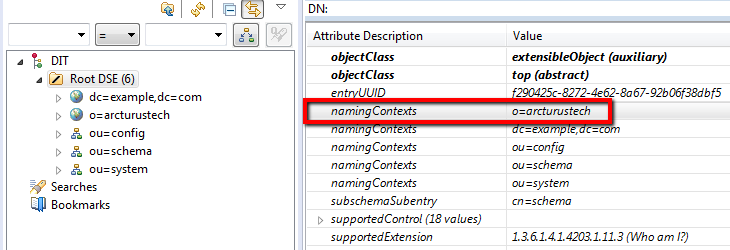
- Click on the Root DSE folder. A new editor will open containing the details of this folder.
Add Organizational Units for Users and Groups
Earlier, we mentioned the structure of a company based on users (containing the personal information of the user) and groups (containing the authorization level of each person). Both of these represent an organizational unit.
In LDAP, to represent an organizational unit we use the organizationalUnit object which is represented by the alias ou. So if we have a unit name users, the Distinguished Name (dn) is ou=users. In our example, the Distinguished Name (dn) is ou=users,o=arcturustech.
Add a users unit:
- Go to the LDAP Browser panel. Expand the Root DSE folder.
- Right-click the o=arcturustech entry. Select New->New Entry. The Entry Creation Method window will appear.
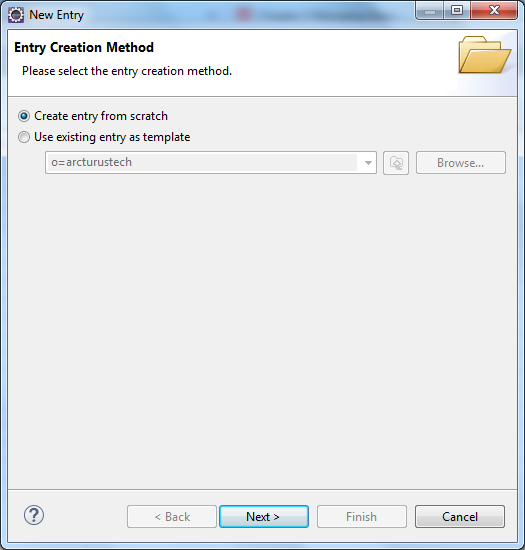
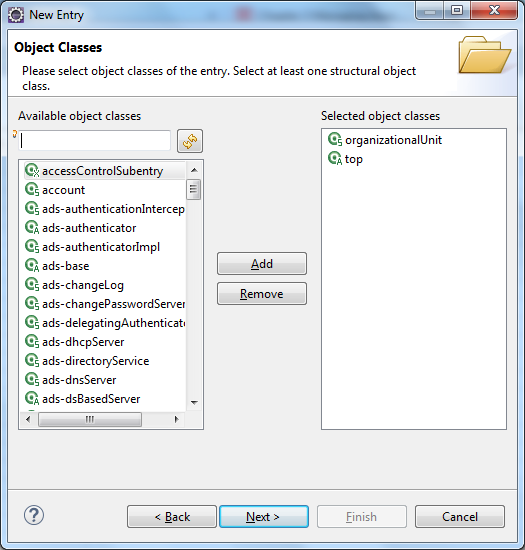
- Select Create entry from scratch. Click Next. The Object Classes window will appear.
- Find the organizationalUnit object. Select it and click Add.
- Click Next. Now you need to enter a Distinguished Name (dn).The Parent field should read o=arcturustech.
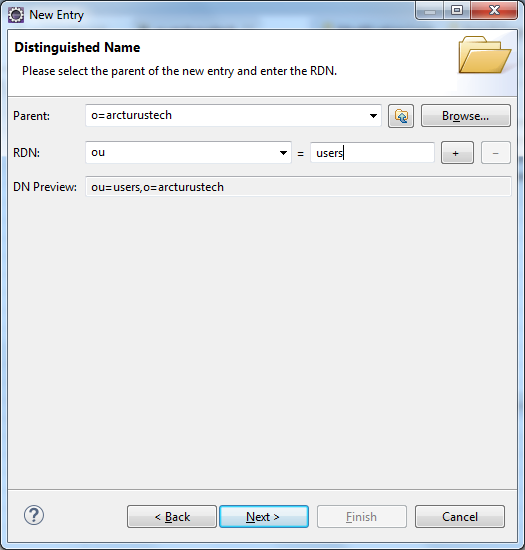
- In the RDN field enter ou. In the value field enter users. The DN Preview should read ou=users, o=arcturustech.
- Click Next. The Attributes window will appear. Examine the values.
- Click Finish. We've just created the ou=users organizational unit.
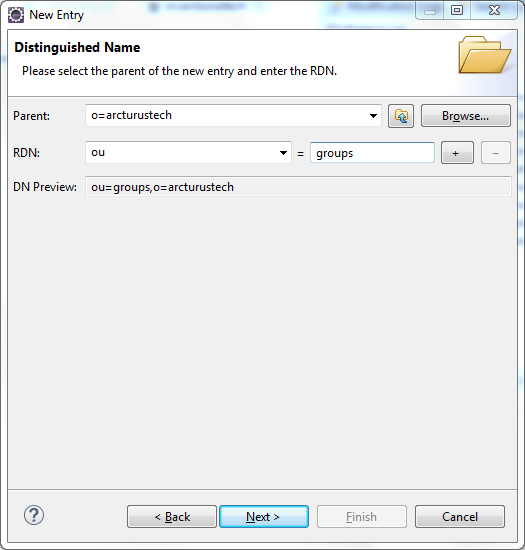
- Do the same operation for the groups (ou=groups) organizational unit.
Add Users
Now we need to add our four people:
- Hugo Williams
- John Keats
- John Milton
- Robert Browning
If we enter their personal information under ou=users, the authorization levels will be under ou=groups. Let's start with ou=users. We'll be adding four persons, and each person will be represented by an inetOrgPerson object.
- Expand the o=arcturustech entry, Right-click the ou=users entry and select New -> New Entry. The Entry Creation Method window will appear.
- Select Create entry from scratch. Click Next. The Object Classes window will appear.
- Find inetOrgPerson object. Select it and click Add.

- Click Next. Now you need to enter a Distinguished Name (dn). The Parent field should read ou=users, o=arcturustech.
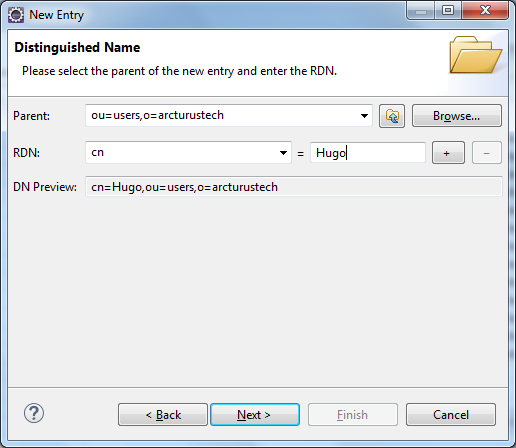
- In the RDN field enter cn. In the value field enter Hugo. The DN Preview should read cn=Hugo,ou=users,o=arcturustech, wherein cn represents Common Name.
- Click Next. The Attributes window will appear. Examine the values.
- Under the sn attribute, enter Williams, wherein sn represents Surname.
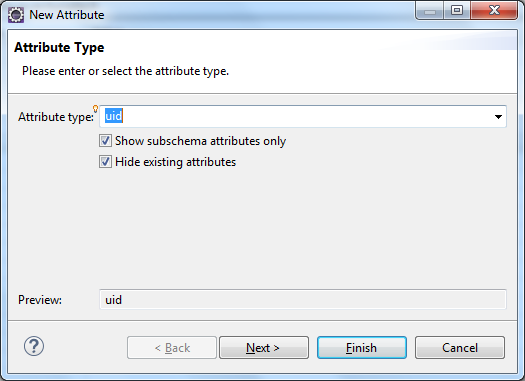
- We need to add a username for this user. Right-click on the current window. Select New Attribute. The Attribute Type window will appear.
- In the Attribute type field, enter uid. This will serve as the username.
- Click Next, then click Finish.
- You're back on the Attributes window. In the uid attribute value, enter hwilliams.
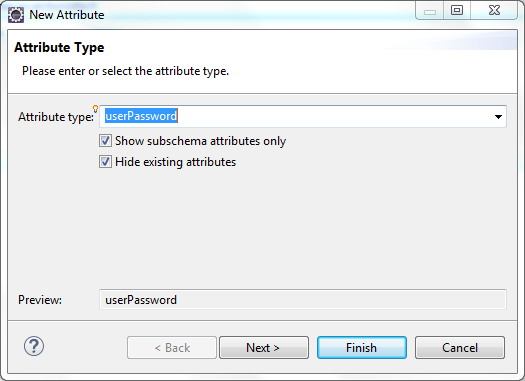
- We need to add a password for this user. Right-click on the same window. Select New Attribute. The Attribute Type window will appear.
- In the Attribute type field, enter userPassword. This will serve as the password.
- Click Next, then click Finish.
- You will be asked to enter a password. Enter pass. Make sure that Select Hash Method is set to Plaintext.
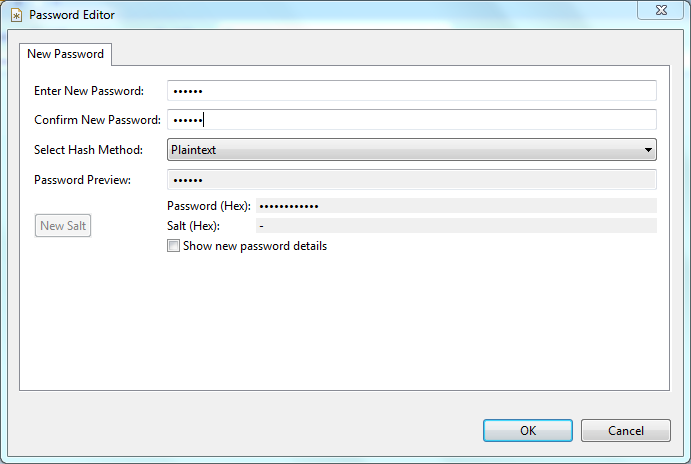
- Click OK.

- A new entry has been added under ou=users. The new entry is cn=Hugo.
- Now we need to add the remaining three users. In order to do that, just repeat the same steps. Here are the details of the three remaining users.
Name: John Keats
uid: jkeats
userPassword: secret


Name: John Milton

uid: jmilton

userPassword: secret


Name: Robert Browning

uid: rbrowning

userPassword: secret
Add Authorization Levels
We have added the personal information, usernames and passwords for each person in ou=users. Now, we are going to add authorization levels under ou=groups. We'll use the groupOfUniqueNames object to represent each role.
To add the user in an admin role:
- Go to the LDAP Browser panel. Expand the Root DSE folder.
- Expand the o=arcturustech entry.
- Right-click the ou=groups entry. Select New. Select New Entry. The Entry Creation Method window will appear.
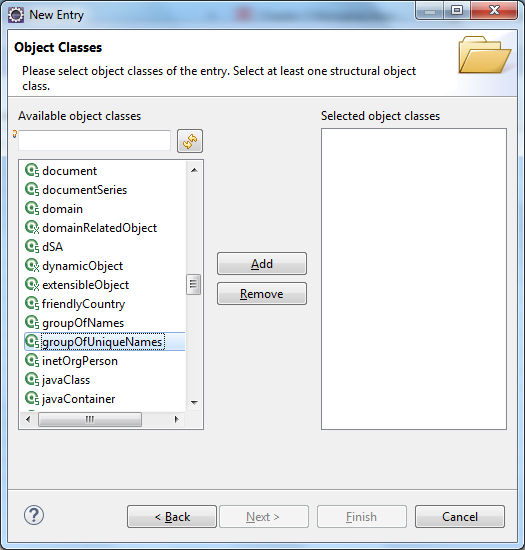
- Select Create entry from scratch and click Next. The Object Classes window will appear.
- Find the groupOfUniqueNames object. Select it and click Add.
- Click Next. Now you need to enter a Distinguished Name (dn). The Parent field should read ou=groups,o=arcturustech.
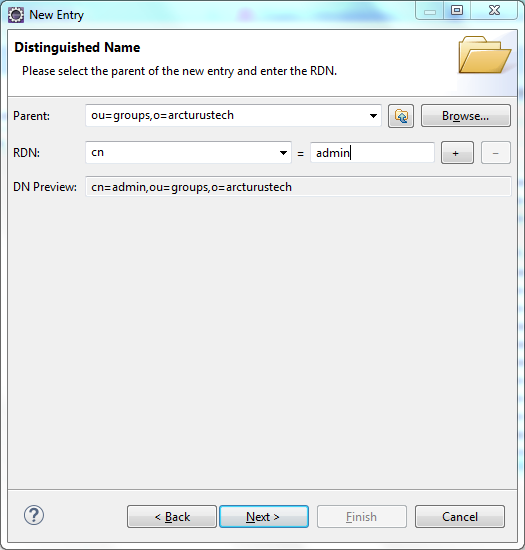
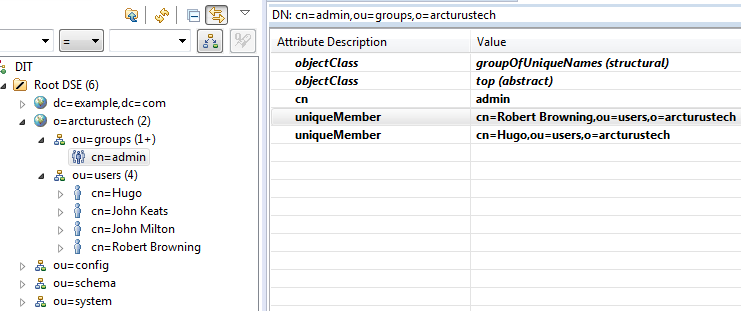
- In the RDN field enter cn. In the value field enter admin(role) The DN Preview should read cn=admin,ou=groups,o=arcturustech.
- Click Next. The Attributes window will appear. Examine the values.
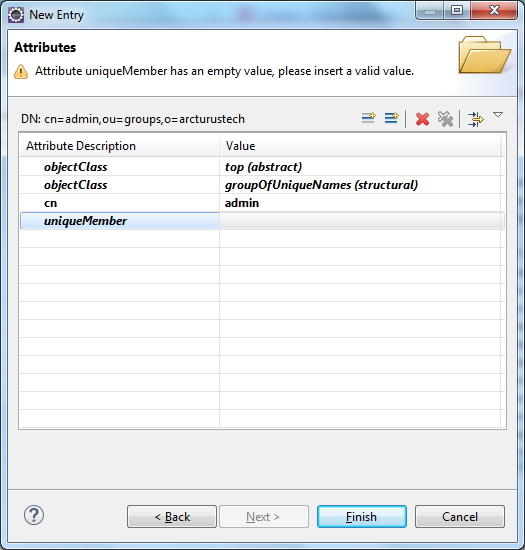
- Notice the a uniqueMember attribute. We'll be placing the Distinguished Name (dn) of our users in this entry. One uniqueMember attribute will represents one user. This means we need to add three more uniqueMember attributes for a total of four.
- Right-click on the same window. Select New Attribute. The Attribute Type window will appear.
- In the Attribute type field, enter uniqueMember.
- Click Next, then click Finish.
- We're back in the Attributes window. We need to add one more uniqueMembers (for a total of four uniqueMembers). Repeat the same steps for adding an attribute.
- Now we need to fill in the values for these attributes. In each entry add the dn of each user. Here are the Distinguished Name for each user.
cn=Hugo,ou=users,o=arcturustech
cn=Robert Browning,ou=users,o=arcturustech
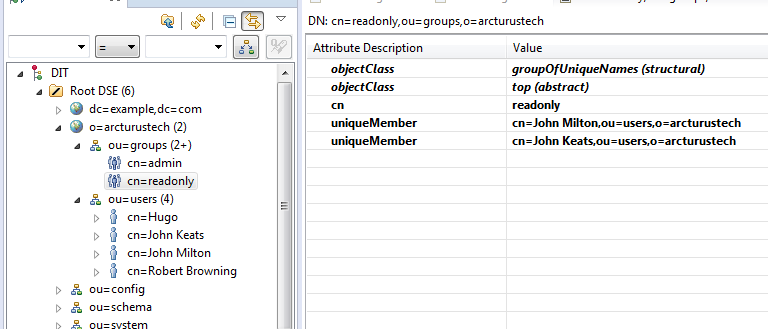
Repeat the same steps to create a readonly group, and add the below user to this group.
cn=John Keats,ou=users,o=arcturustech
cn=John Milton,ou=users,o=arcturustech
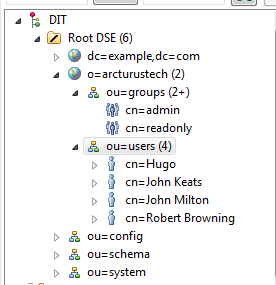
The final structure should look like this:
Please sign in to leave a comment.
Comments
0 comments